Desk Setup
Installations
Before you start choose a large working area or a work bench, free of clutter and levelled. Give yourself plenty of space. All the necessary tools are provided for you inside the box, but you will need a cordless drill with a Philips head or a Philips screwdriver for connecting your desk frame to the desktop.
Step 1.
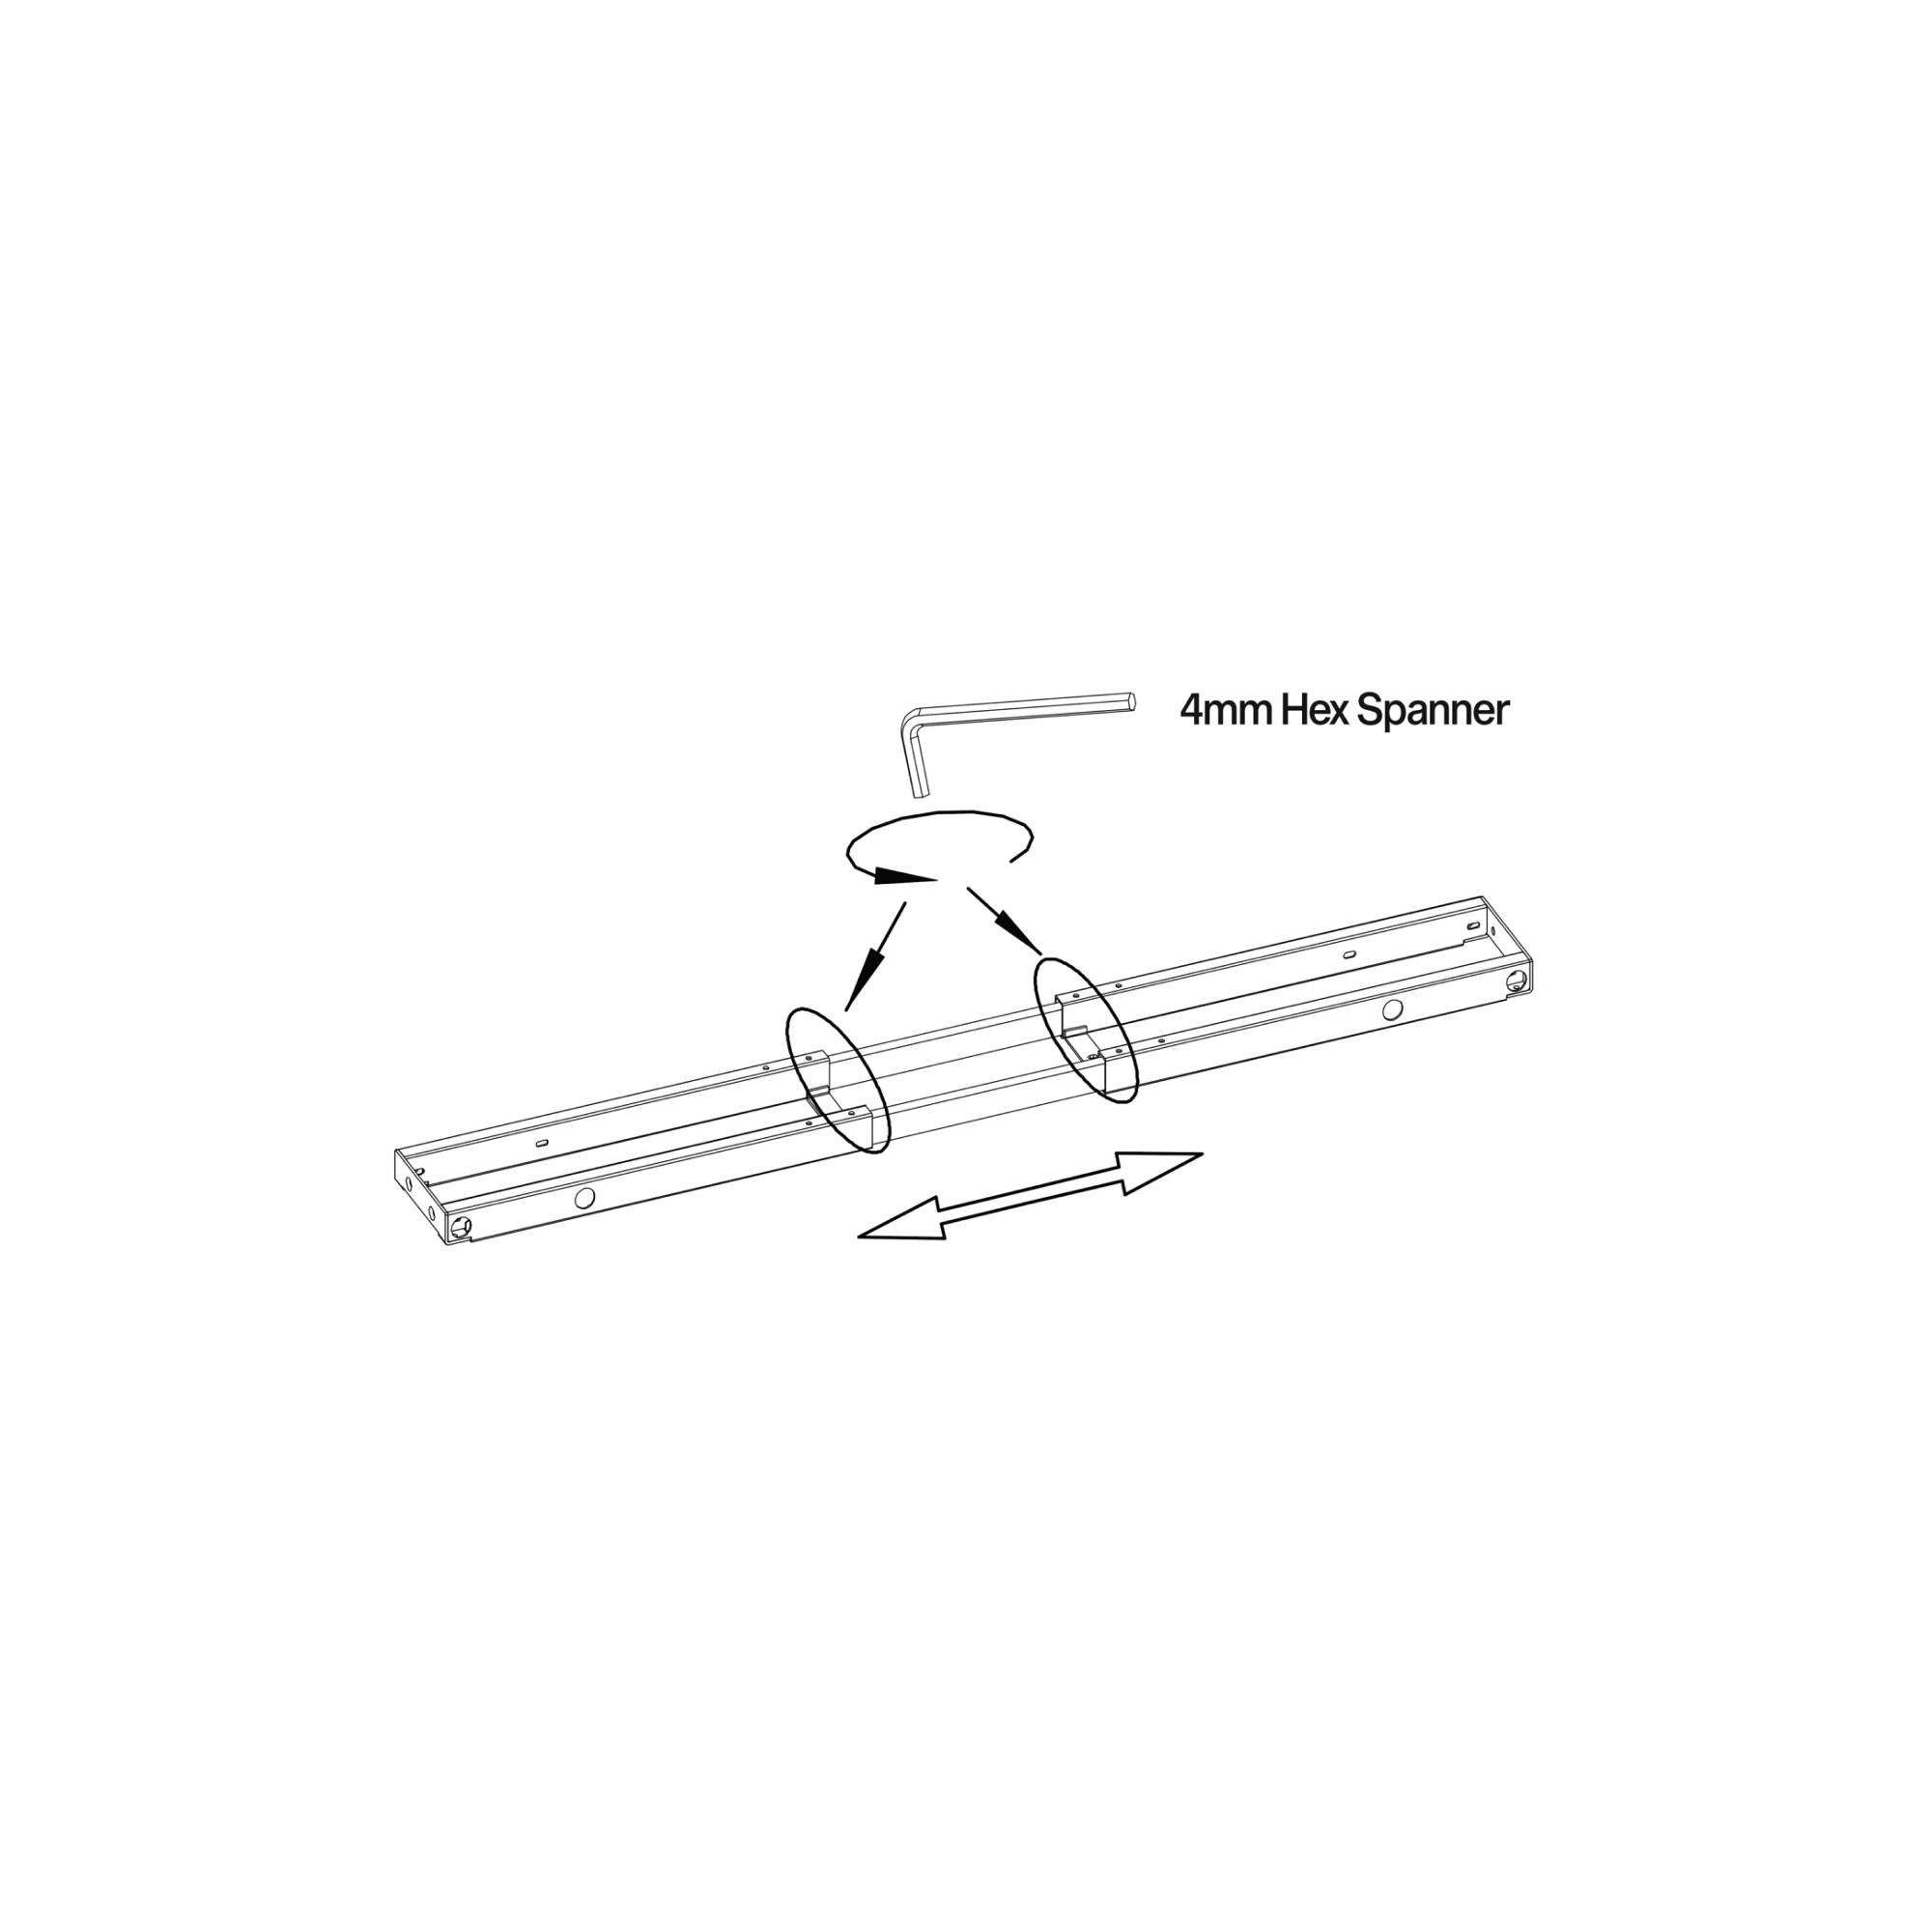
Place the box facing up the right way. Now open the box. Take out the beam, place it on your table or work bench and loosen the 4 screws on the beam using the smaller Allen Key NO.9 (4mm Hex Spanner). Once loosened, adjust the beam to a wider position, ideally wide enough to fit your desktop. (Does not have to be accurately widened at this stage).
Step 2.
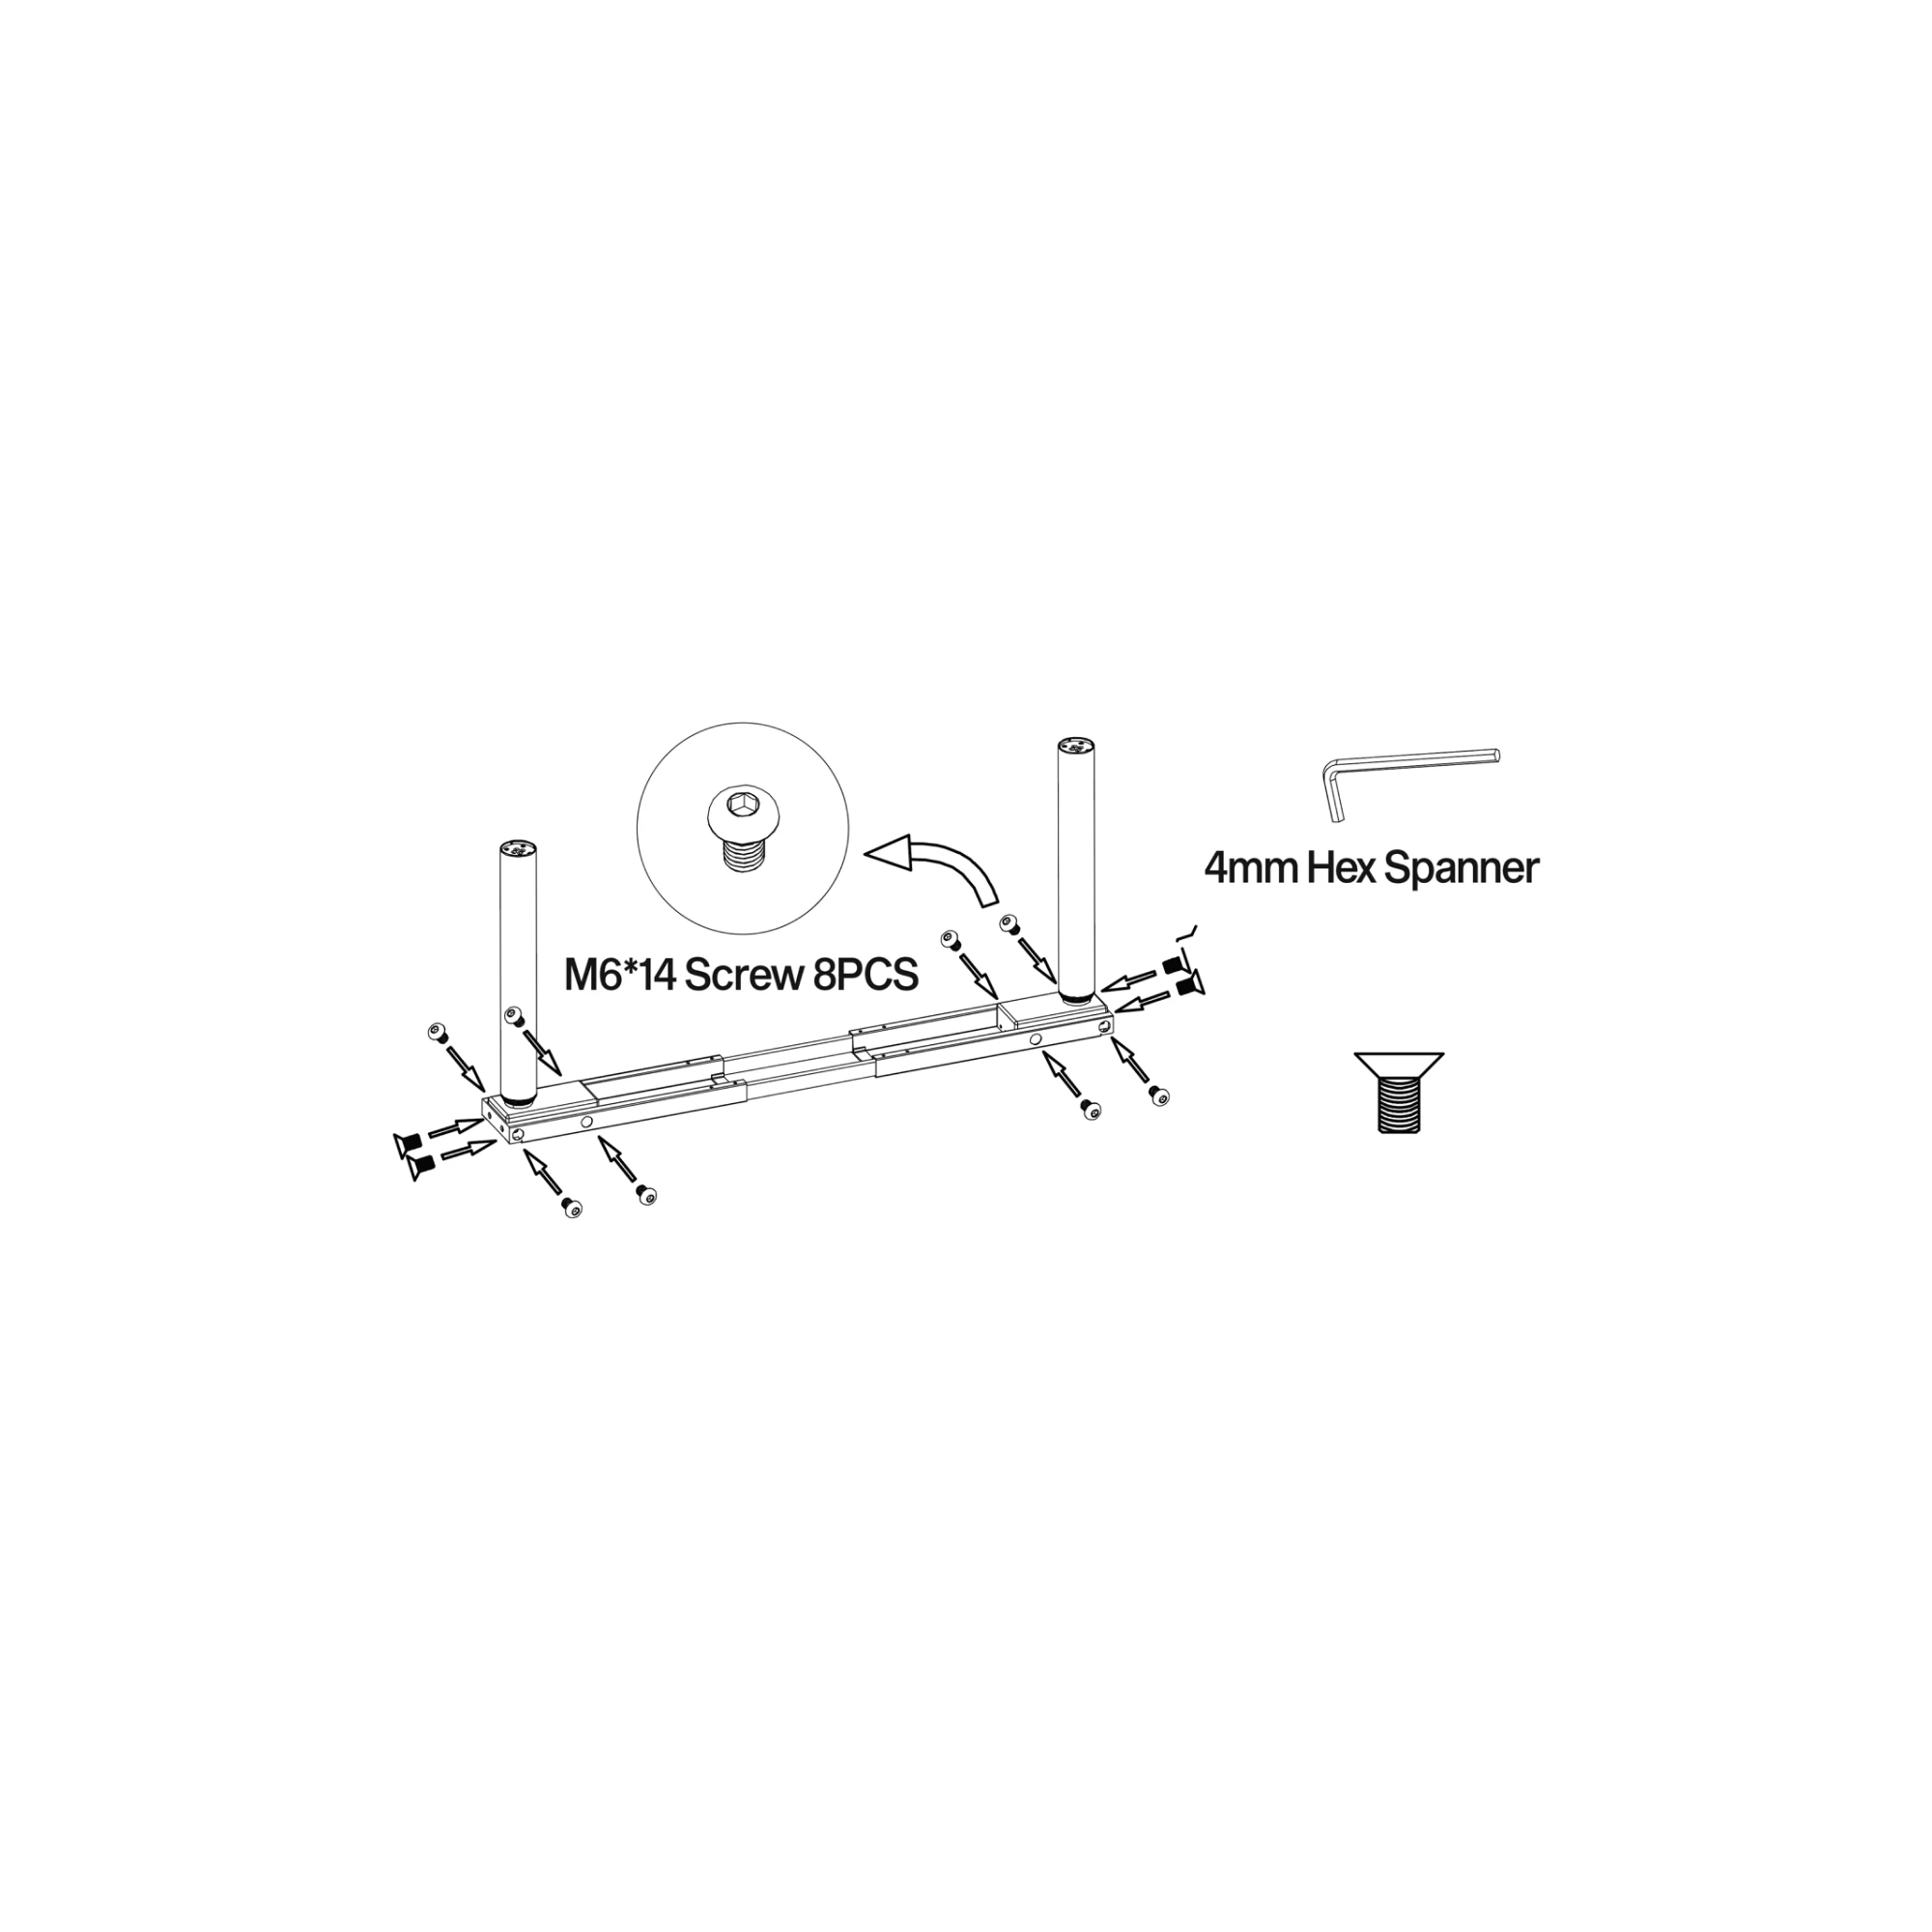
Carefully take out 1 desk leg at a time and attach each leg to the beam one at a time using 2 different types of screws. First the 8 x M6*14 Screws NO.6 and then the 4 x M6*12 Screws NO.11. You should never fully tighten screws until the end when the desk is fully assembled.
Step 3.
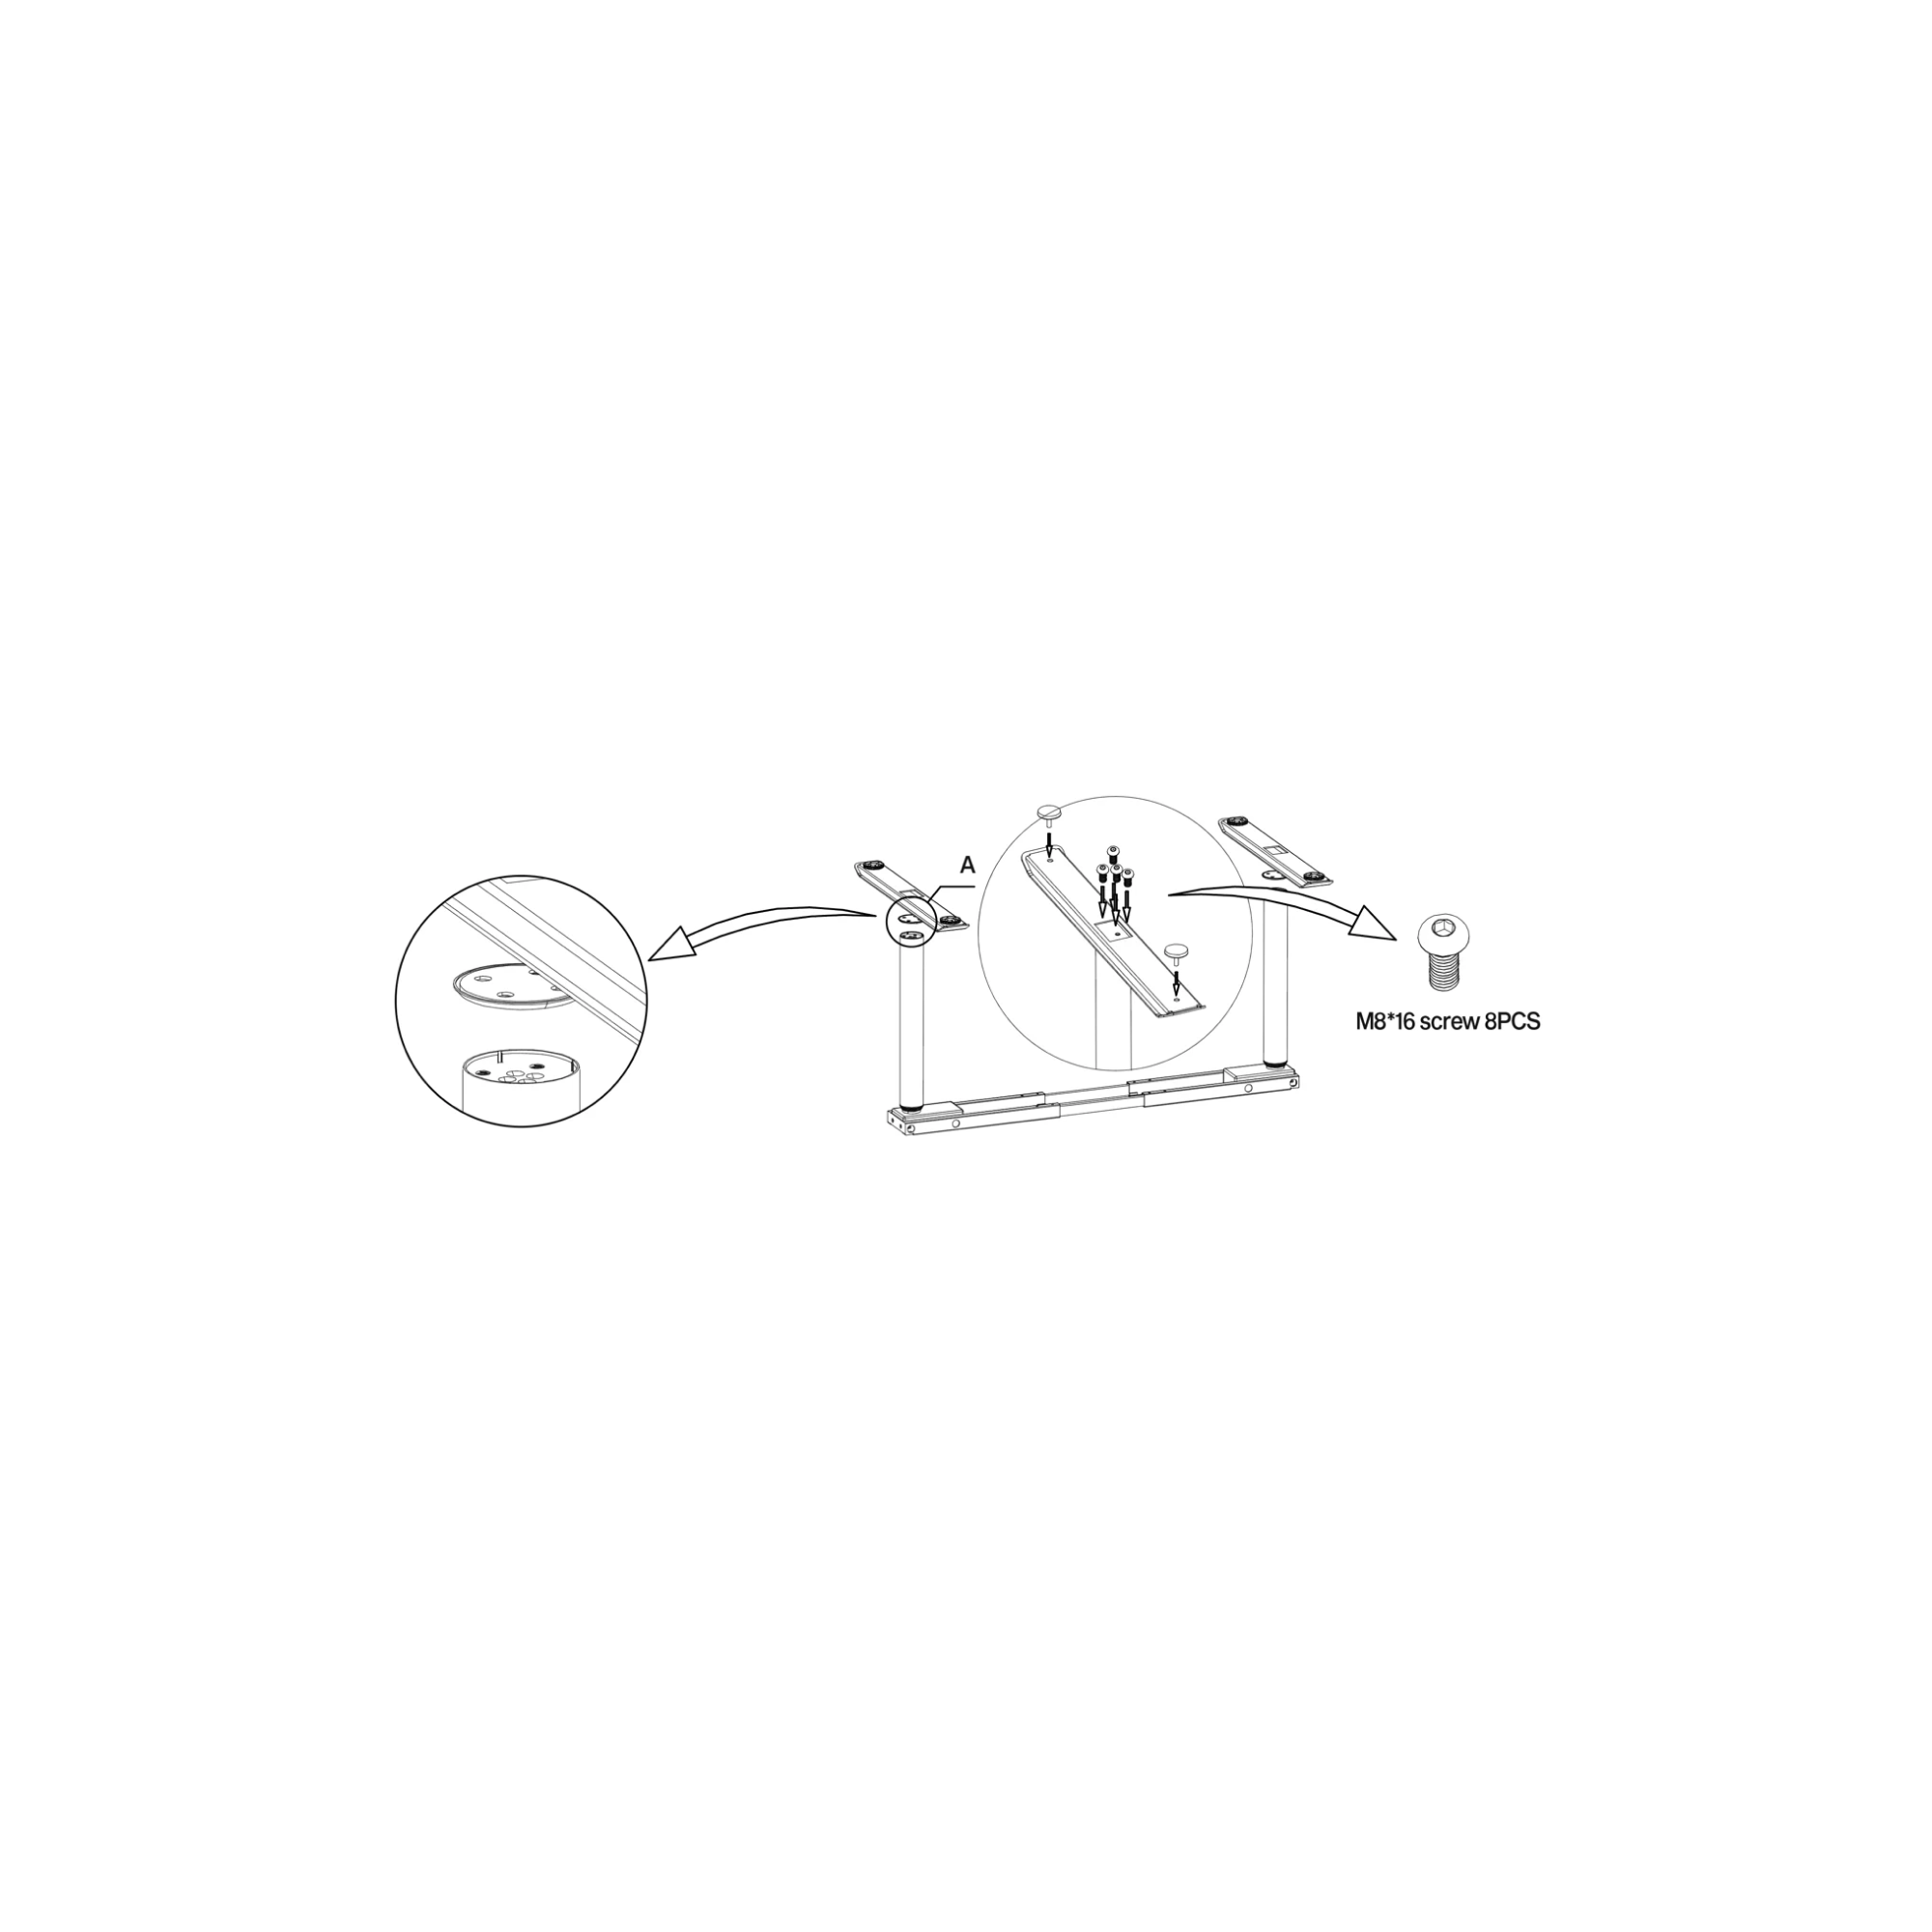
Now it’s time to attach the desk feet to the desk legs. Place 2 x Plastic Mats NO. 13 on top of legs in between legs and desk feet. Attach feet using 8 x M8*16 screws NO.4. These 2 round plastic mats must sit between the legs and the feet to provide levelling and protection. Use the larger Allen Key NO.10 (5mm Hex Spanner). Tighten screws well.
Step 4.
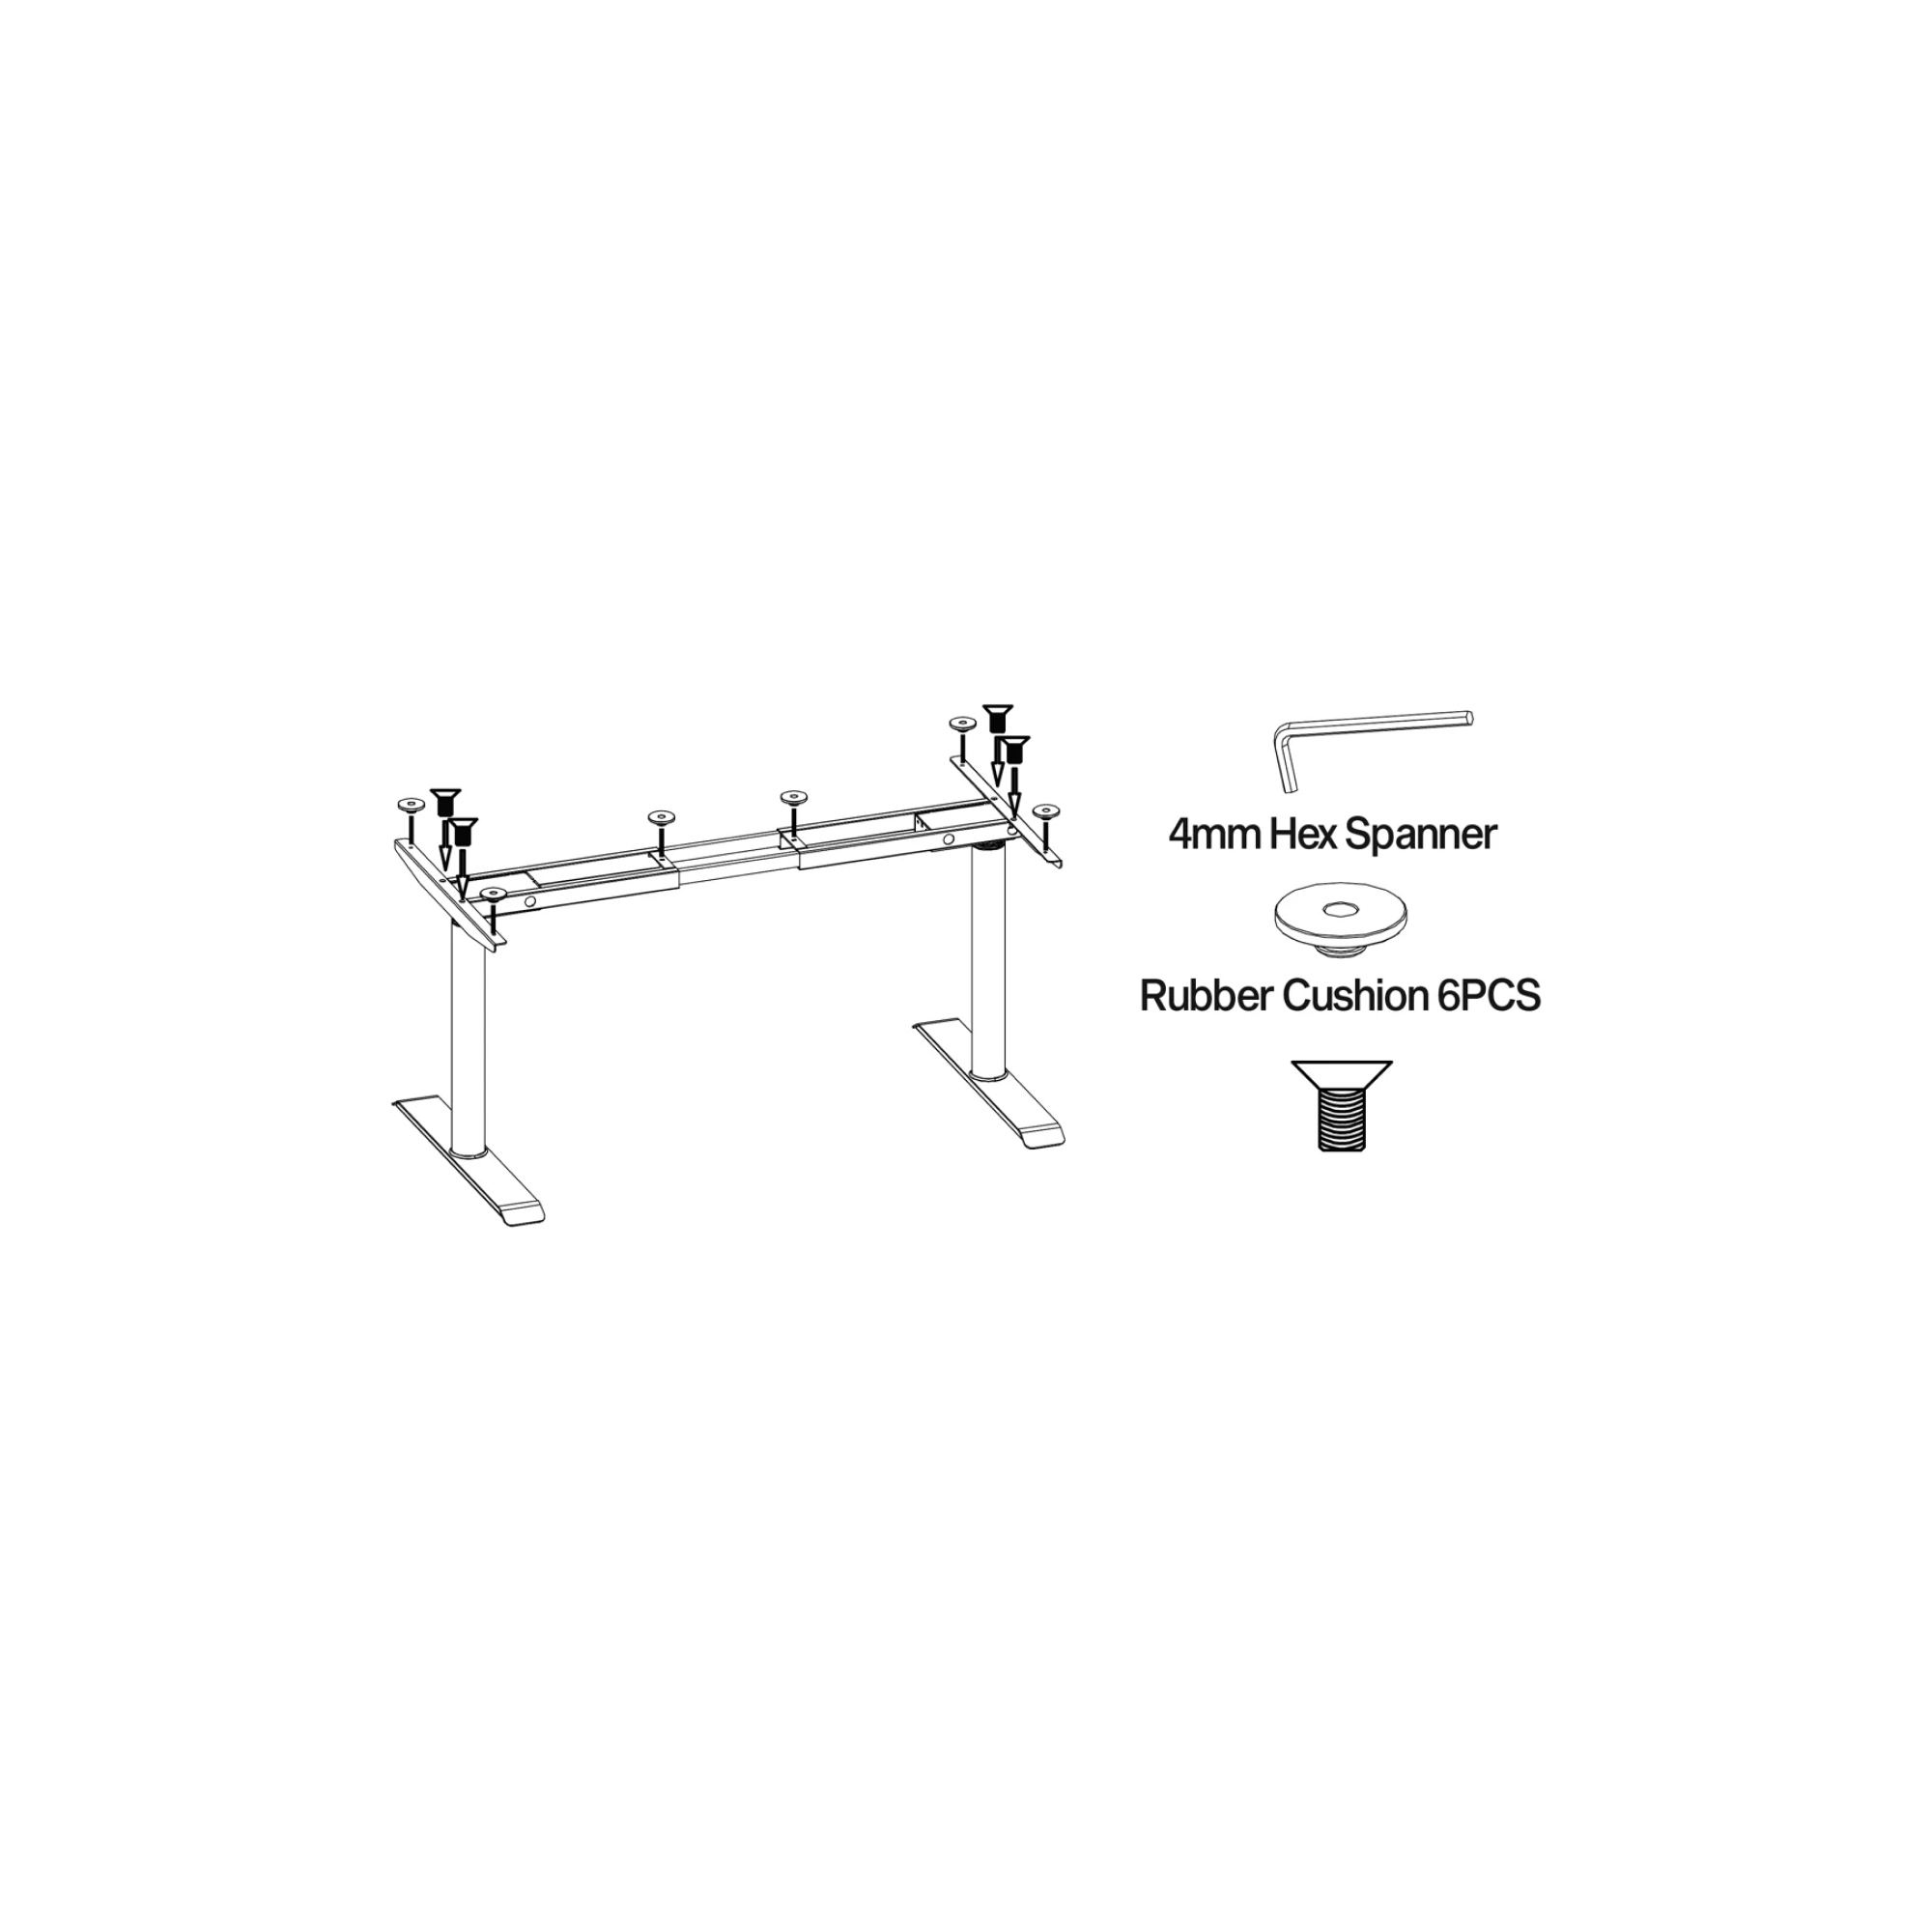
Carefully overturn the desk frame (best done with two people) and attach the 2 x desktop brackets to the beam using 4 x M6*12 screws NO.11. Now fit 6 x Rubber Cushions NO.12 into the bracket and beam allocated slots. These will protect and act as a soft dampening between your frame and your desktop.
Step 5.
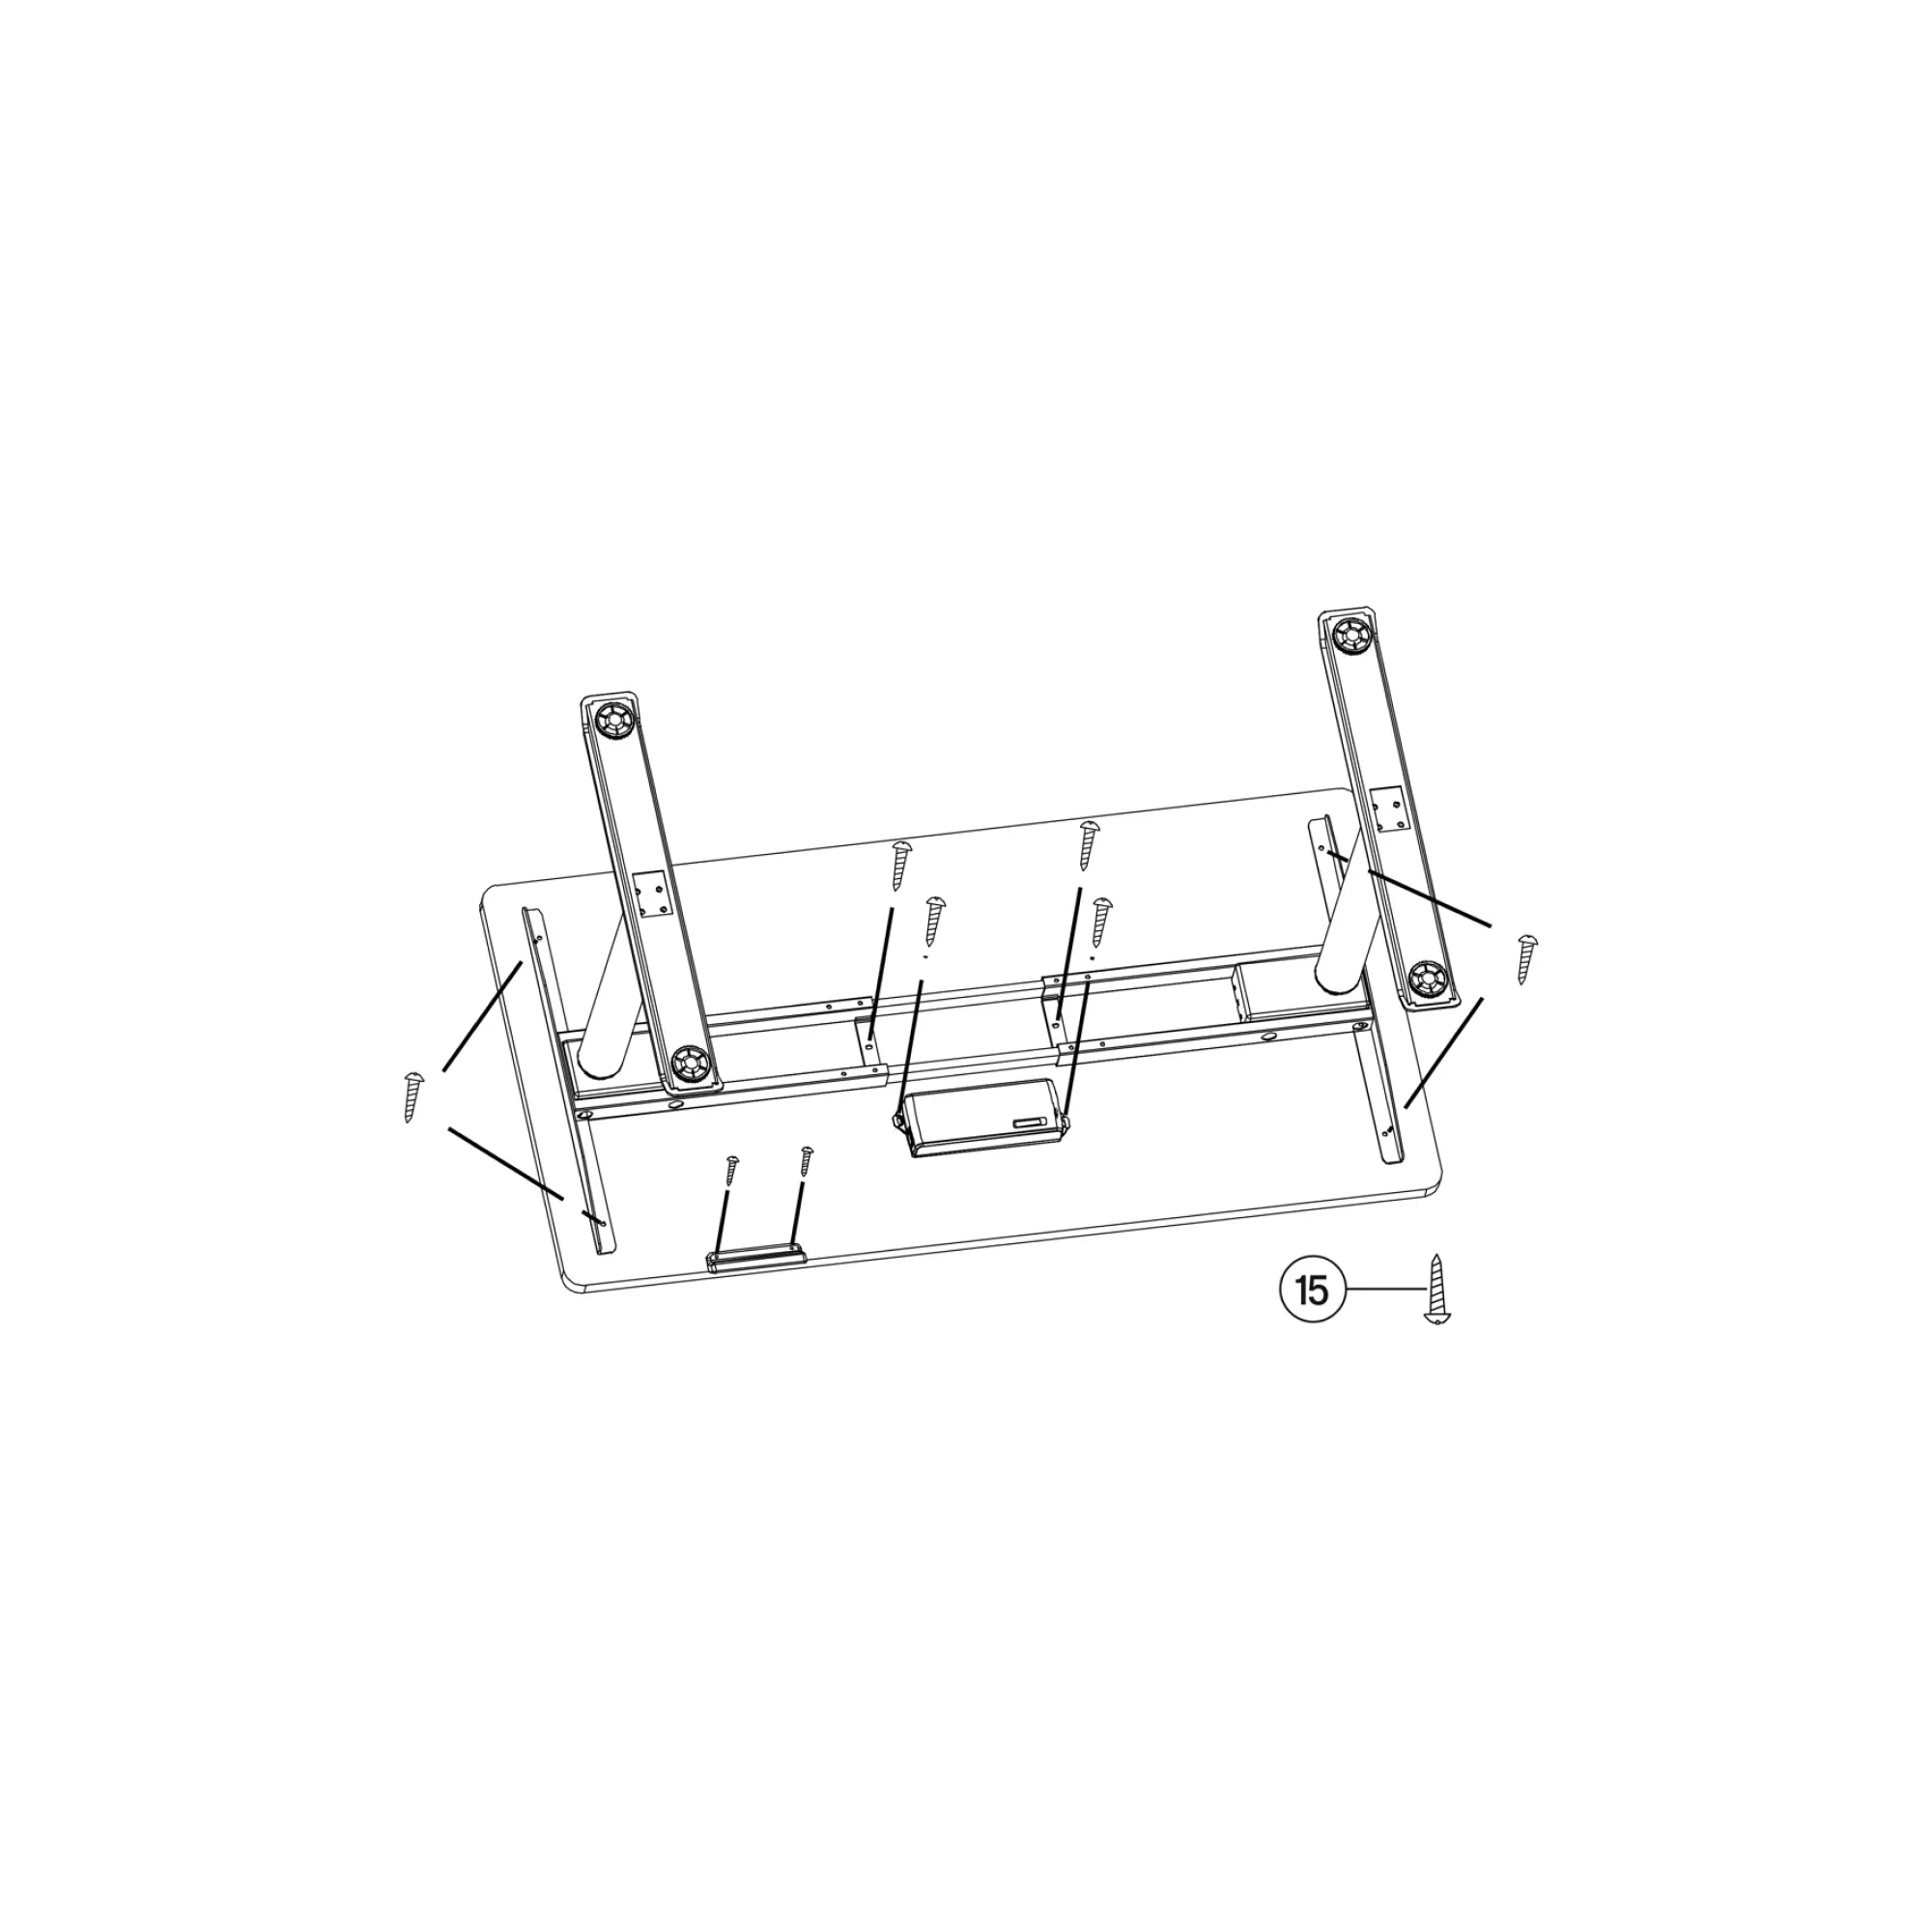
It’s now time to attach your desktop to your desk frame. We recommend placing your desktop face down on the floor or on your working table. Carefully with the help of another person, overturn your desk frame upside down and position it on the back of your desktop. Adjust the width of the desk frame to fit the desktop by sliding the beam. If you purchased one of our desktops, the screw positions have already been pre-drilled for you. If you are using your own desktop, we recommend leaving 4-8cm of the desktop width on each end as overhang. Now screw the desk frame to the desk and the controller box in the centre of the beam using 8 x ST4.8 NO.15 self-tapping screws. Attach programable controller handset to the desk using 2 x ST3.5 NO.14 self-tapping screws. (Controller handset position right hander, on your right, left hander, on your left).
Step 6.
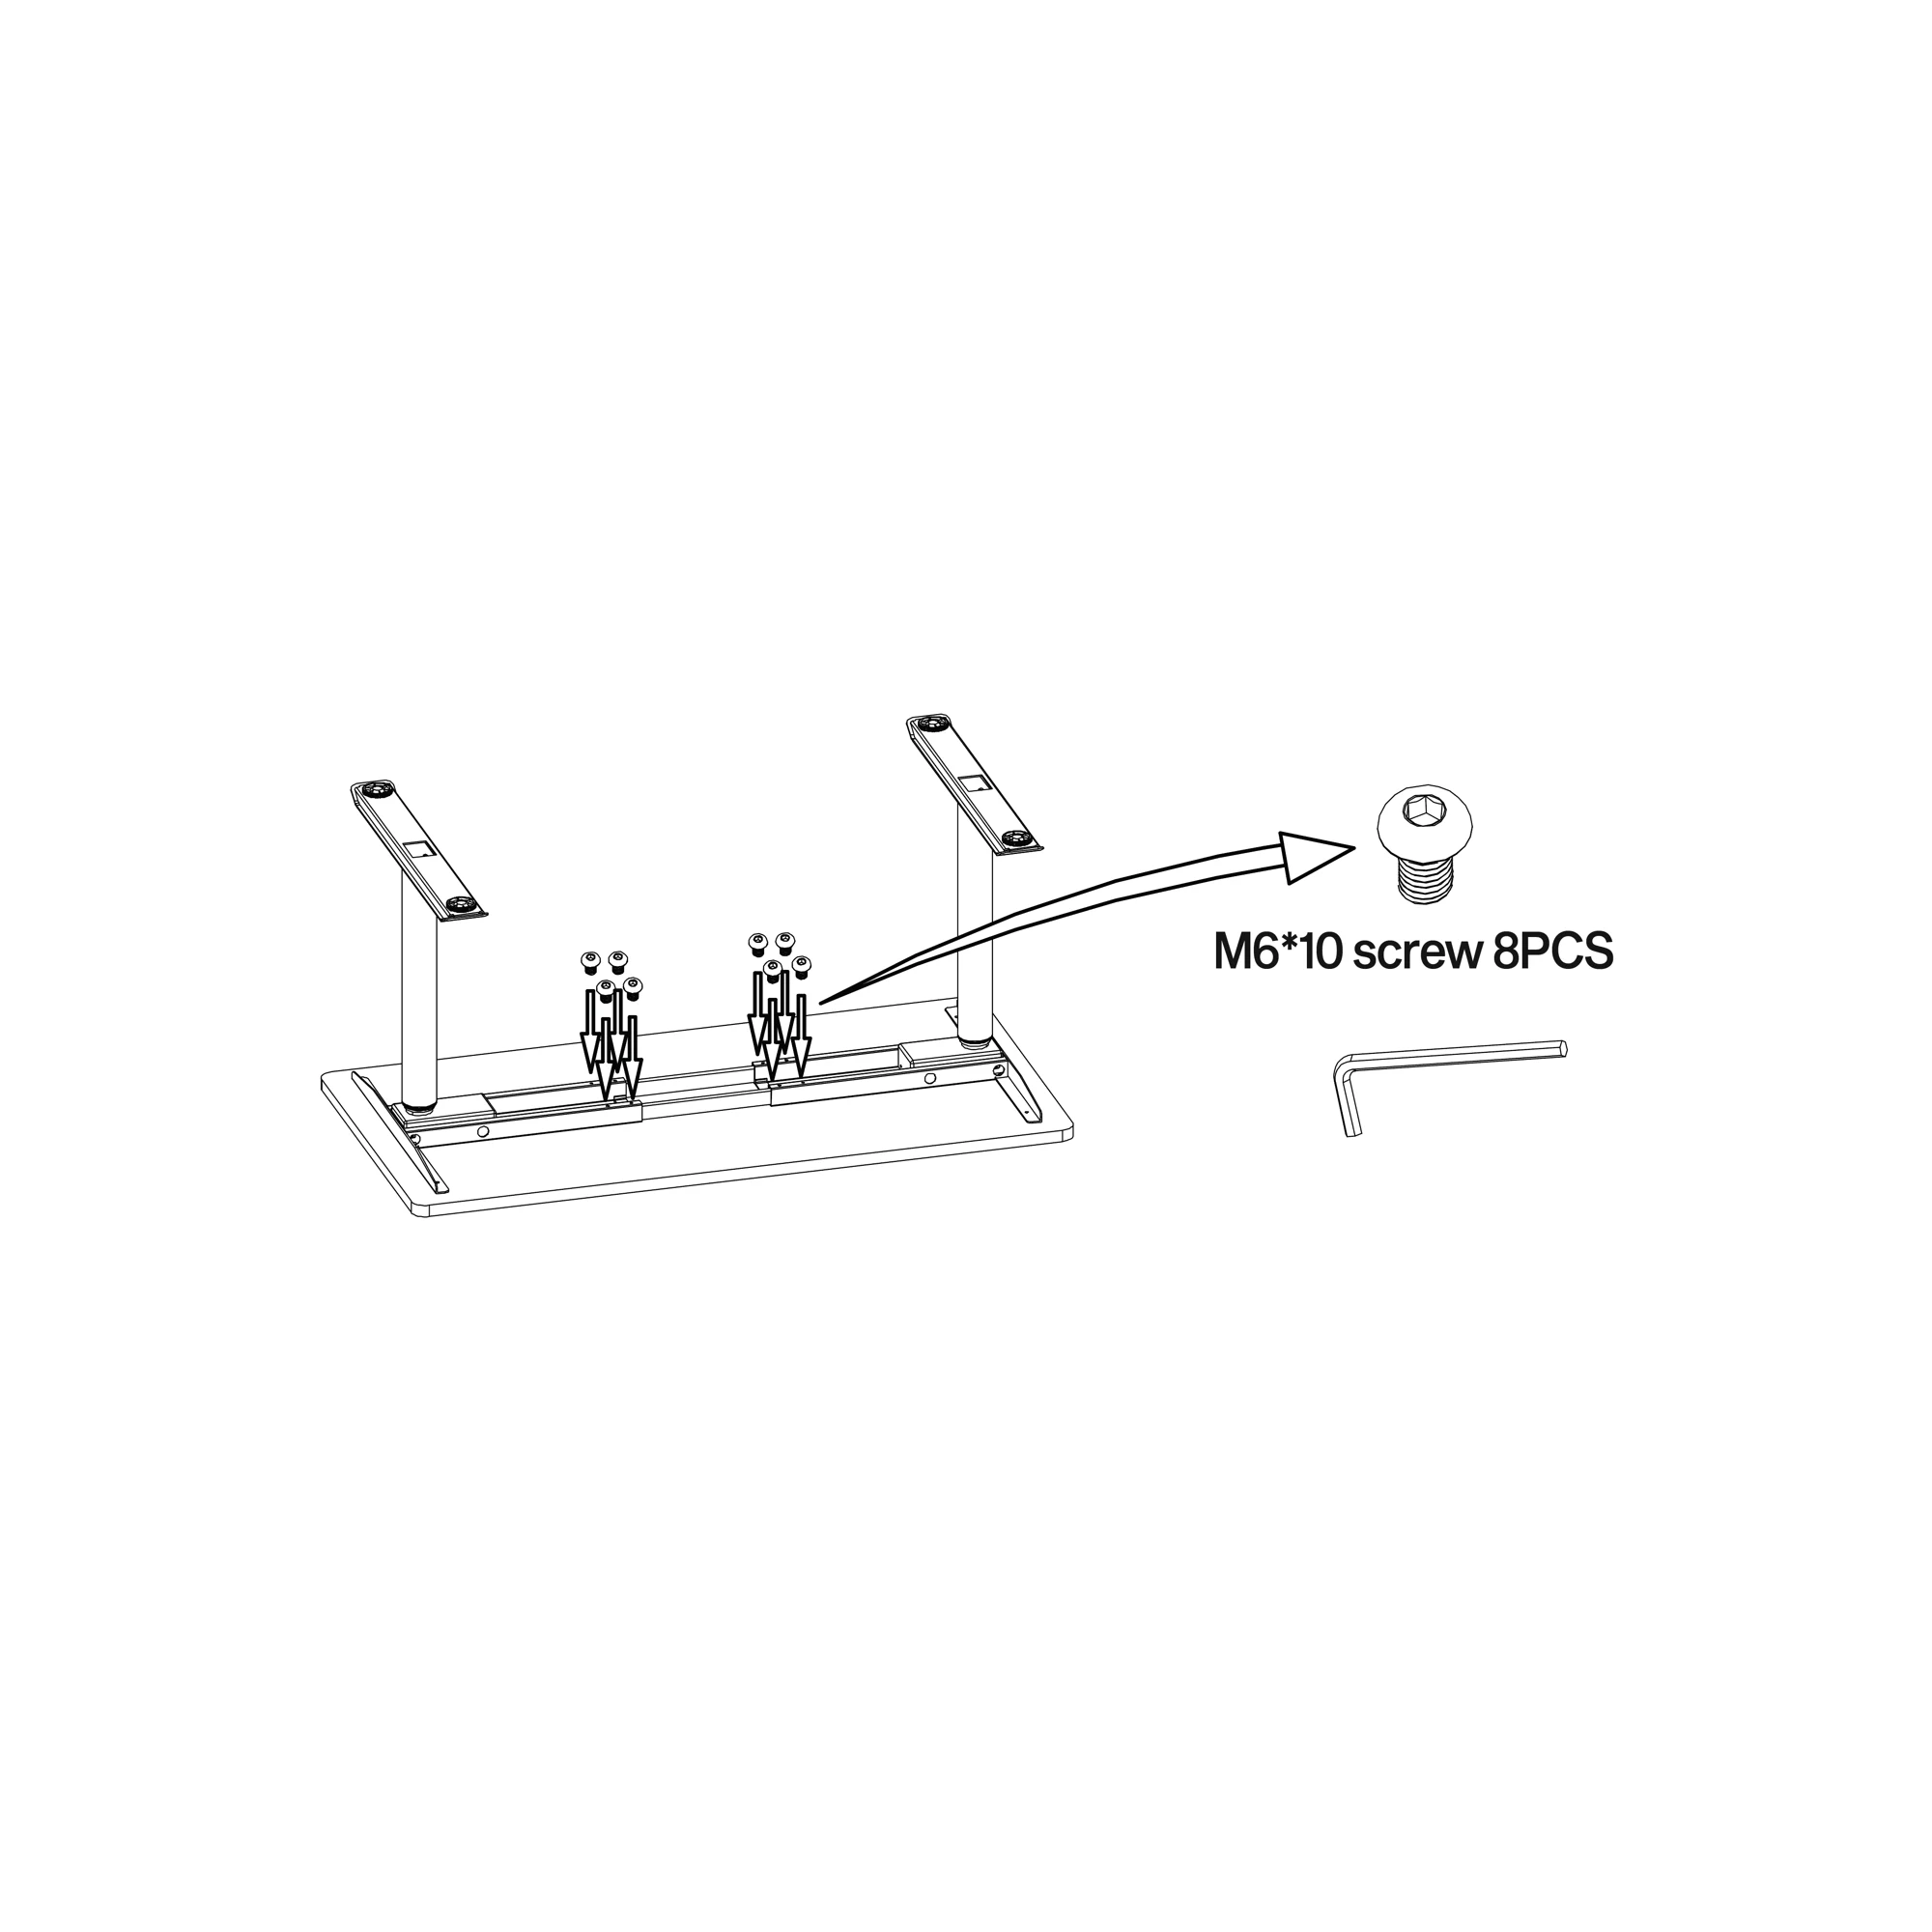
Now that the desk frame is fully and accurately attached to the desktop, go ahead and tighten up the screws in the desk frame beam using 8 x M6*10 NO.7 screw with the small Allen key. This will ensure the frame is now fixed in position. Now check all screws around the frame and make sure they are tight.
Step 7.
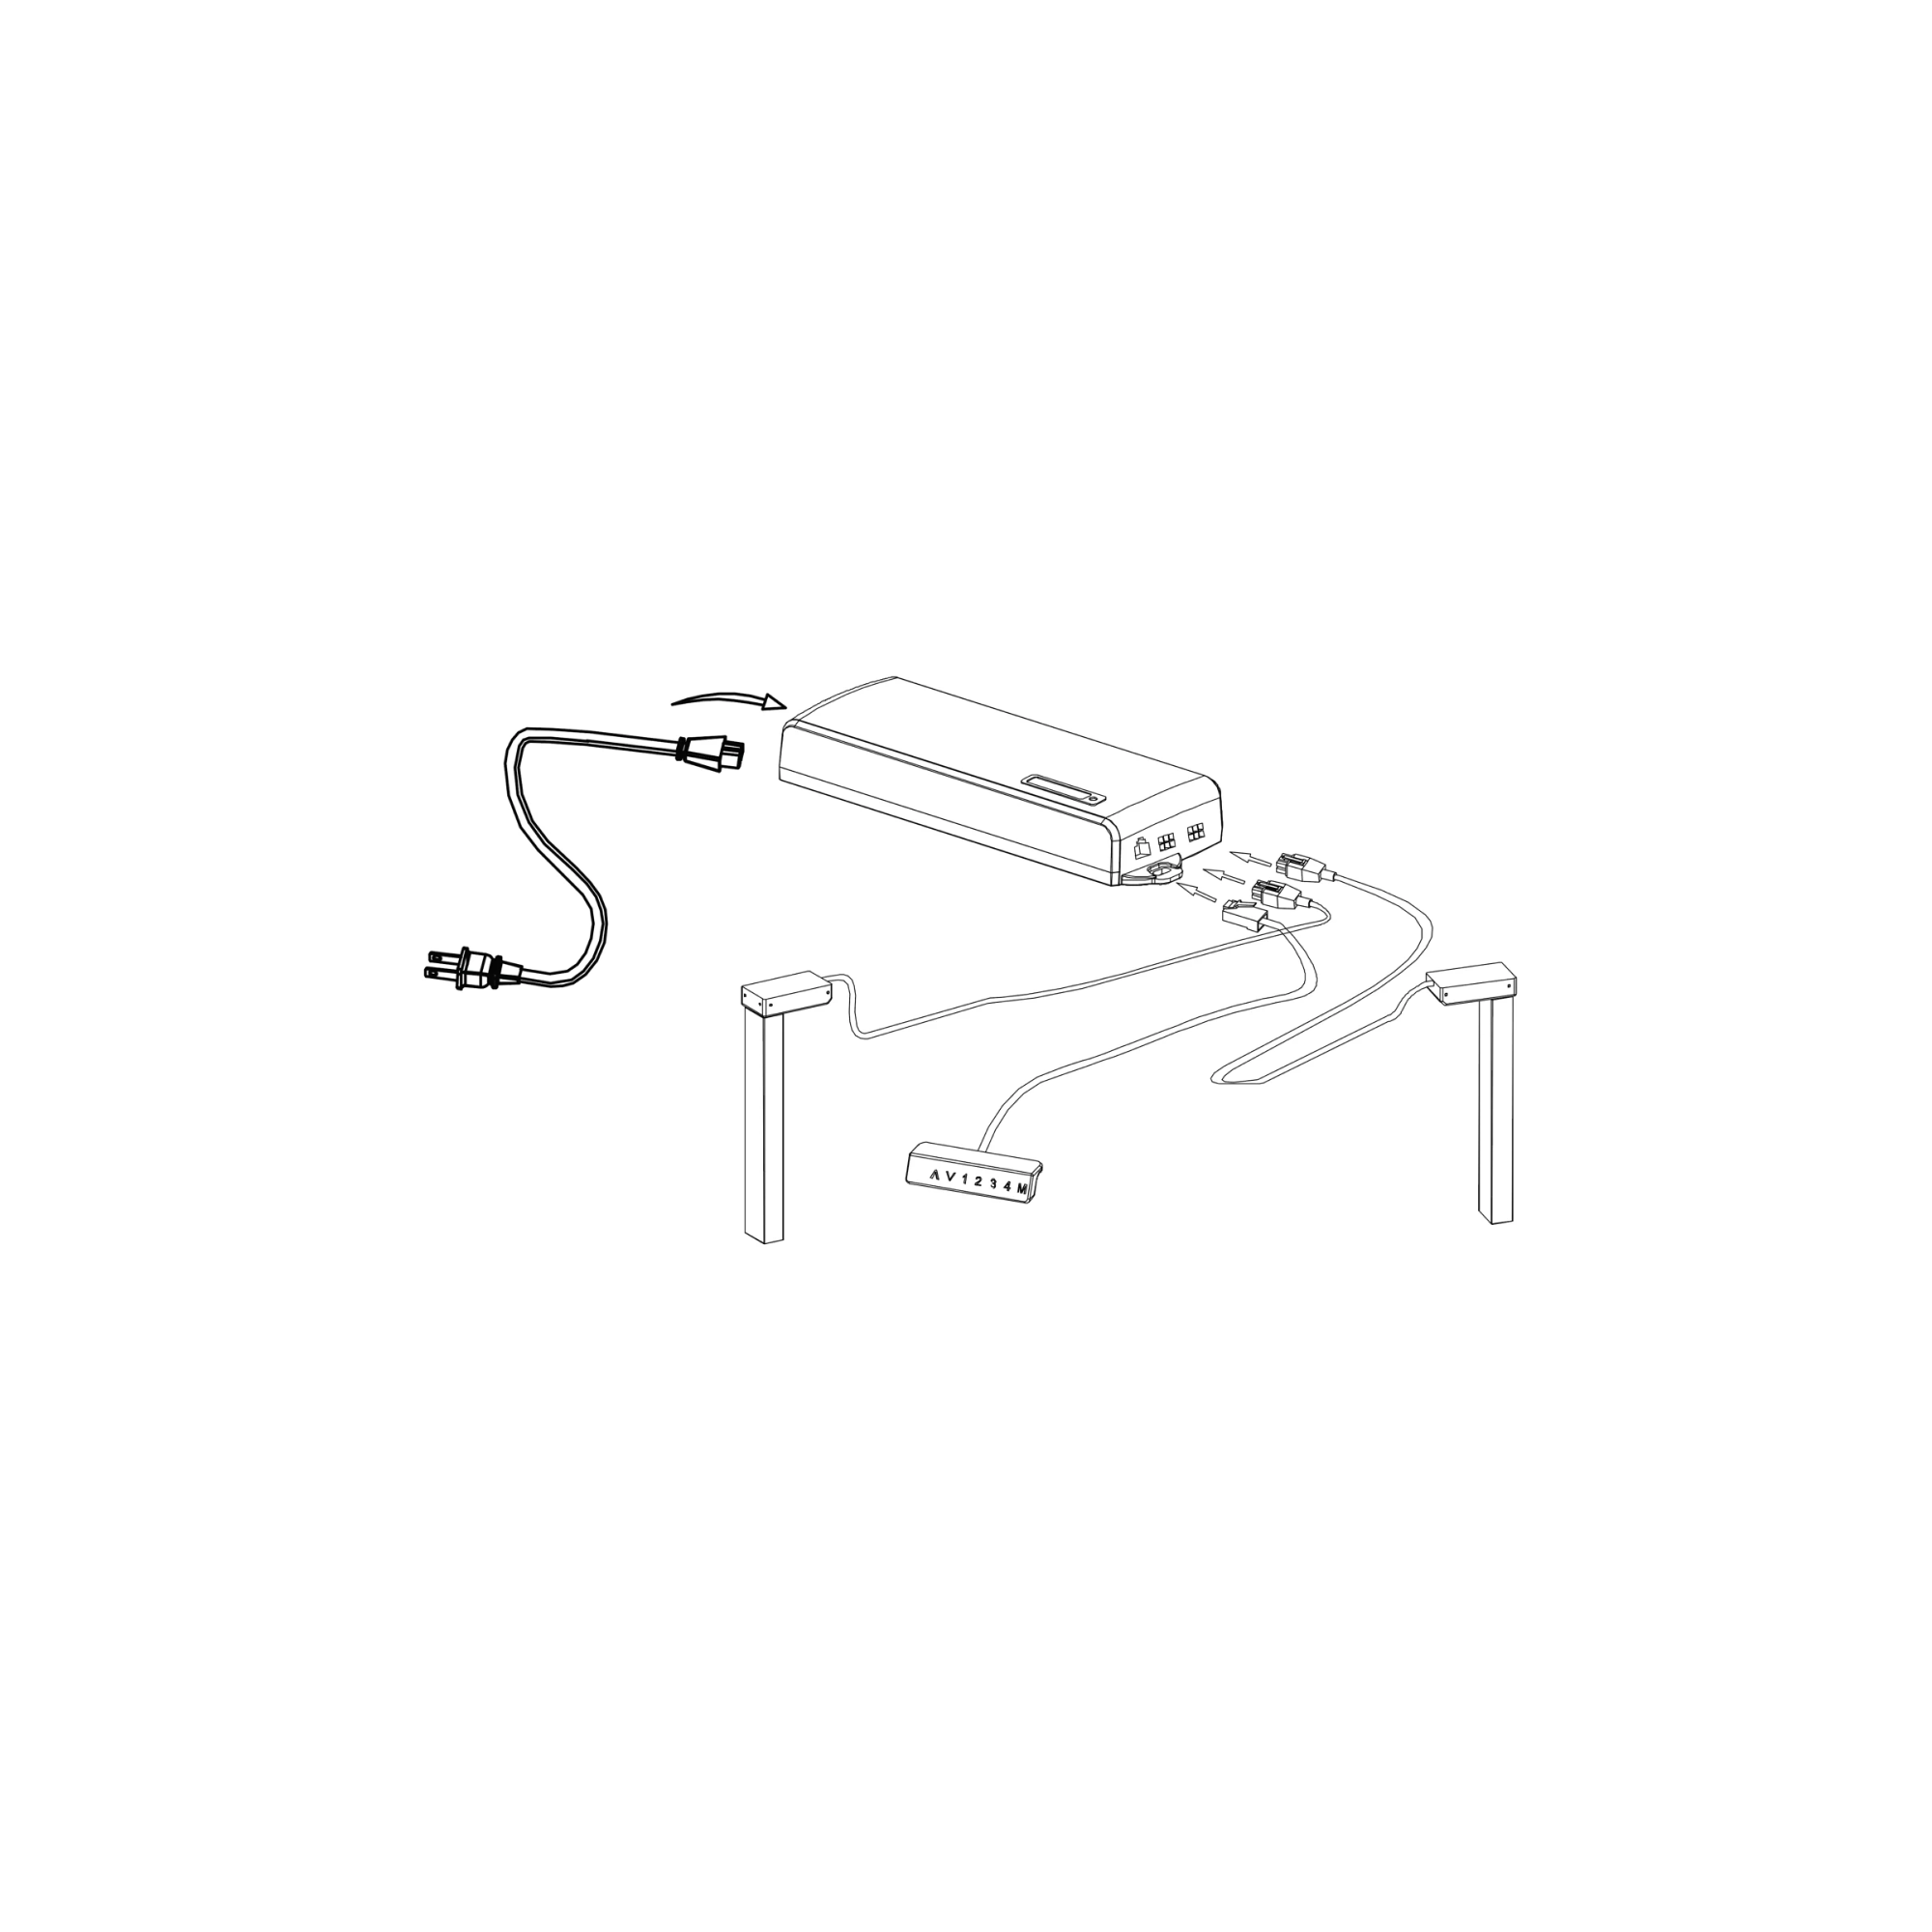
Connect the handset cable and the 2 x motor cables into the control box. Plug in the power cable into the control box. Now carefully overturn your desk and plug in the 3-pin power cable into your power source. Your new Holistic Desk assembly is complete. Yay...Now refer to Operations Guide for using your desk for the first time.